


Let’s discuss sample preparation. Obviously, you need a sample to start with. The goal is to get a hand sample, a polished slab to reveal the macroscopic features and the samples for the microscope. Sure all of it must representative for the mine or ore body under research. The size of the slab determines the size of the sample needed. If the samples are collected on dumps, they should be large enough to cut away all weathered zones.
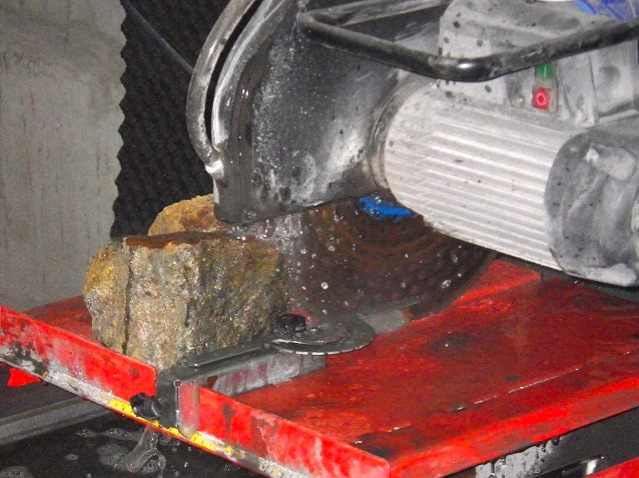
First step is cutting the slabs. I use a diamond saw with a 350 mm diameter blade for this purpose. They are comparably cheap, allow fast cutting, use water for cooling instead of chemicals, but on the bad site produce a rough and distorted surface. To make sure you do not see artifacts from cutting, quite some grinding action is needed. The slabs can be 5-10 mm thick which allows one to hold them easily during grinding and allows several re-polishing cycles later. Here is the saw in action on a complex Swedish ore sample:
Once done, the next step towards a polished slab is grinding, but let’s stay with cutting. The next step towards samples for microscopy is to cut the slabs into smaller pieces. Depending on the ore type they can be cut blind, or interesting parts need to be marked and then cut. Since the large blade is 3 mm thick, a lot of material is lost during slab cutting. For cutting the samples a smaller saw is therefore used.
__
 ____
____
And finally the right size for mounting them later on a glass slide.
_

The resized samples are then cleaned, dried and sorted under a stereo microscope. Samples with damages like cracks are discarded, or, if really interesting, marked for stabilization by vacuum impregnation with epoxy resins. Samples for further evaluation are forwarded to the grinding and polishing process.